


scotfly
-
Posts
43 -
Joined
-
Last visited
Content Type
Profiles
Forums
Events
Store
Posts posted by scotfly
-
-
WOW, the things i learn from british banter
British?


I'm Scottish.

-
I seem to remember somewhere reading that the originals were made up using spun deer hair to make them float,
You're not far off the mark there Fishietails.
At the height of their popularity/infamy a deer hair version of the "booby" was introduced. I think it was meant to appeal to the more "traditional" minded angler.
It was however quite different both in appearance and in its intended purpose from the present day "Blob"
-
give a jerk on the line the blob
I make no comment!

-
-
See the Blob in a number of Brit. FF mags. as a go to flies. Are there just used on fresh stockies or will they work on real fish? They look a whole lot like fish pellets.
The Blob as mentioned in FF mags is nothing like Fishietales Blob.
They are primarily a "fly" for catching "stockies"

-
albanna...in regards to the classification of the G & H sedge vs. the Goddard, i always considered the one i tied to be a goddard caddis as the G & H sedge has an underbody of colored fur and the goddard doesn't...just what i was taught but i could be wrong...

drb, the G & H sedge and the the Goddard's Caddis are one and the same. Simply a case of the Goddard name carrying more esteem and poor Henry being forgotten about.
The lack of underbody is simply the way Goddard ties it now, it's not a different fly, more an omission.
-
STEP 6
Prepare the wing as per the tail.
Pull enough fibres (approximately twice the width of the wing) and align the tips. Then cut them off the stem.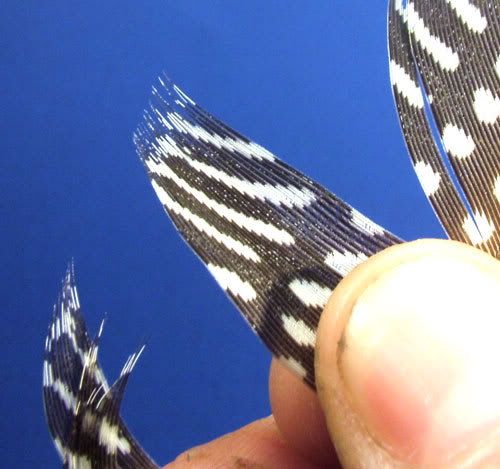
Fold in half. Dull (inner) side to dull side.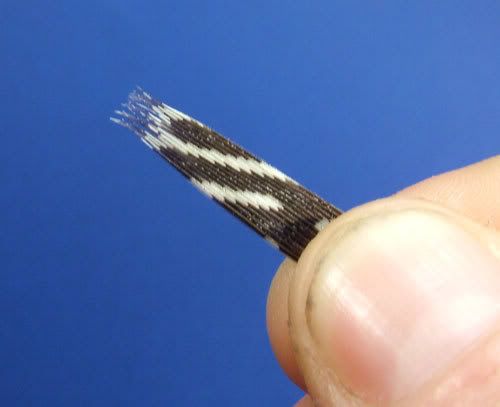
And that’s your wing ready to tie in. When they’re wet they will look just like normal paired slips.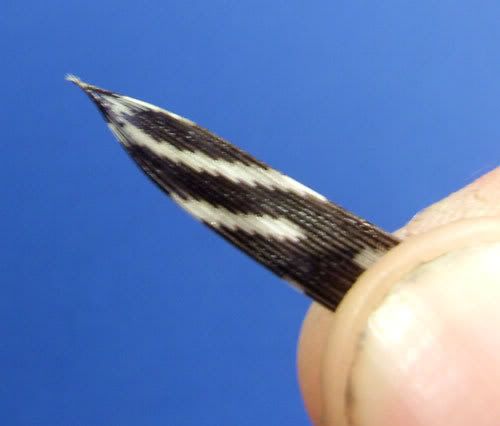
Tie in as you would normally for paired slips.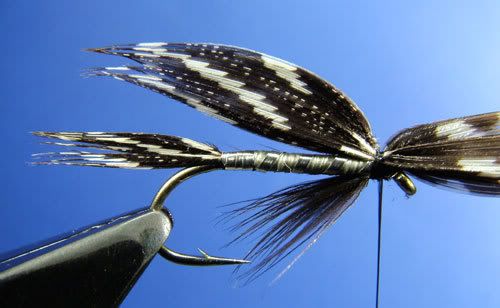
STEP 7
Finally trim the waste. Form a neat head, whipfinish and varnish for the completed fly.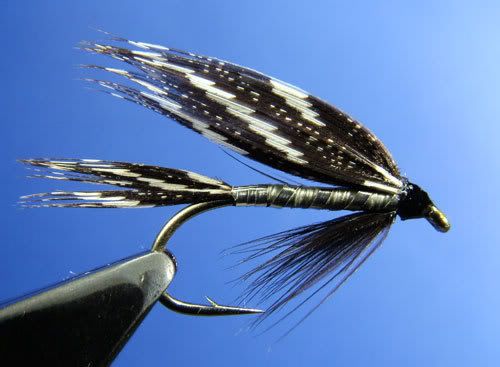
-
This is my contribution to the cross board swap.
This is a Ray Bergman style wet fly. I’m not quite sure what constitutes a Ray Bergman wet though, other than the size I see no difference in it to the wet flies we’ve been tying in the UK for a long time. I suspect it may have more to do with the American desire to create their own history than anything actually unique about them.
That aside though, I do think it is a very pretty fly and well deserved of its name, the “Beauty”
Because I didn’t have the right materials to tie this strictly to the pattern I’ve had to “cheat” a little, I’ll explain the “cheats” as I come to them.
Instructions assume right-handed tyers.
HOOK – Kamasan B175 #8
THREAD – Black 6/0
TAIL – Guinea Fowl
TAG – Flat Silver
BODY – Grey Floss
RIB – Flat Silver
BEARD HACKLE – Black Hen
WING – Guinea Fowl
STEP 1
Attach the thread wrap towards the bend, catching in the tail as you go. The tail is made from paired Guinea Fowl wing slips. I only had a packet of primaries and for some reason only from one wing! So this is the first cheat. I could/ should have rolled the slips, but because Guinea Fowl is a “meatier” feather than the likes of Bronze Mallard it produced too much bulk. The solution was to simply cut a slip twice the width required and then fold it in two. Pics in the winging step. Not strictly text book tying, but as long as the fly tying police don’t come knocking on my door I can live with it.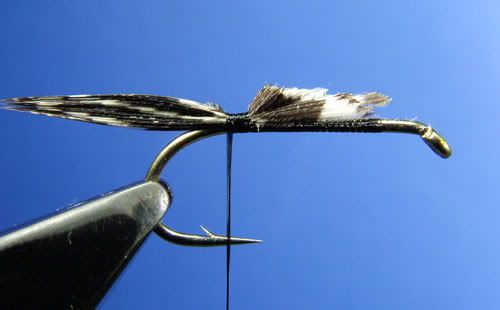
STEP 2
With the first turn of thread back up the body catch in the flat silver which will form the tag and the rib, taking the thread to the point shown.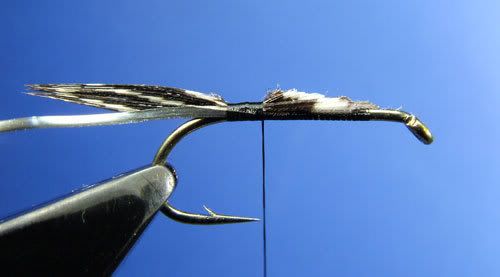
STEP 3
At this point tie in the floss for the body. The pattern called for a dark gray floss body, but I only have a light gray, so this is the next “cheat” Normally on a fly like this I would tie the floss in at the shoulder and wrap down then back up the body giving two layers. Because I didn’t have any dark grey floss I have given the body only one layer. This will allow the dark thread to show through and darken the floss when the fly is wet.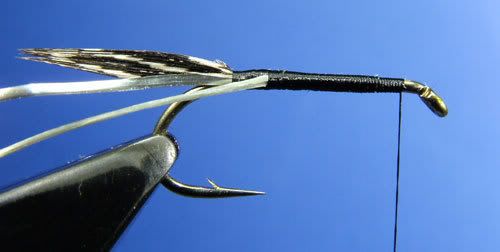
Wrap the body to the shoulder.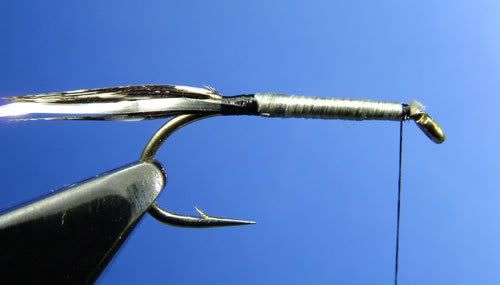
I now have one layer of floss which, as you can see, will darken considerably when wet.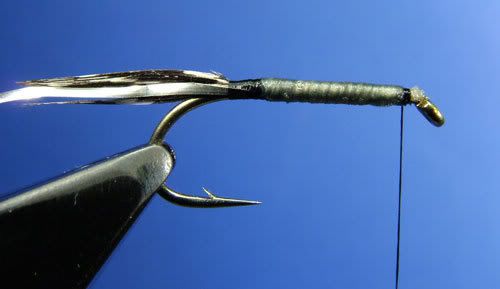
STEP 4
Wrap the tinsel to form the tag as shown, but don’t tie it off.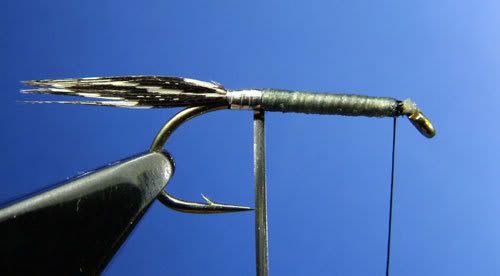
Instead continue wrapping, in an open even spiral, to the shoulder before tying off,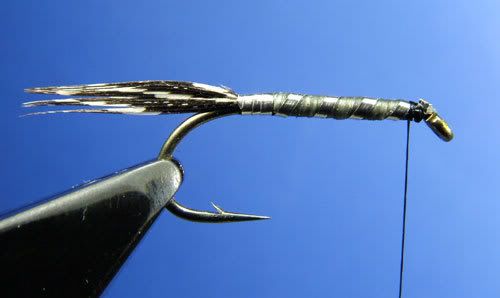
STEP 5
Invert the hook in the vice and tie in the beard hackle.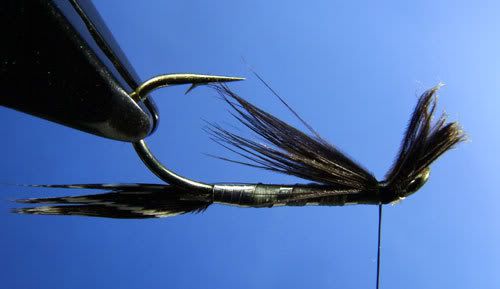
-
any more that are interested in getting in on this one?...if there is, i'll hold off on the poll for another couple of hours...
I think I've been nobbled
 Had I known I'd entered this contest I'd have submitted this little "Beauty"

-
can you have a double shank hook in BC?
You can tie it on singles too strangelady
 Or tubes/waddingtons.
The most important point to get right is the wing. Make sure it is flat and parallel, or it'll swim like a wobble spoon!
-
STEP 6
Double the hackle and tie in.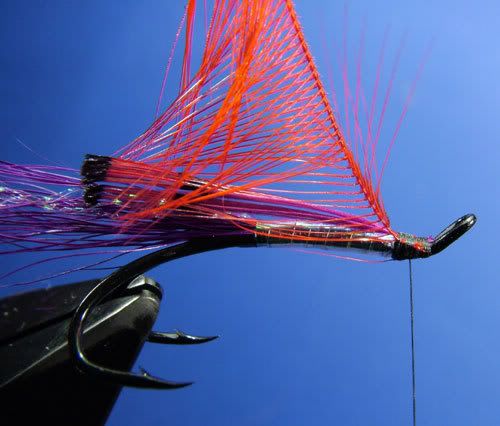
Then wrap and tie off.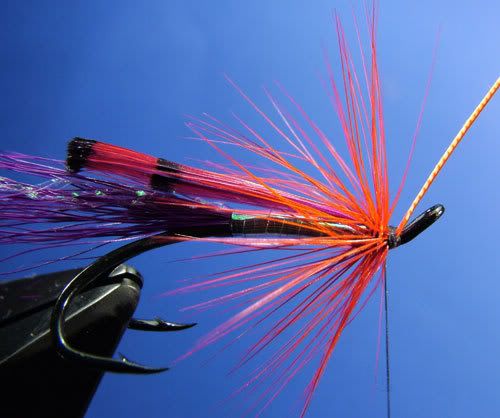
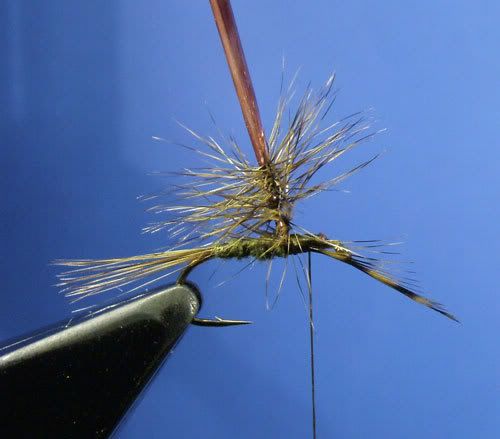
STEP 7
Finally whipfinish and varnish for the completed fly.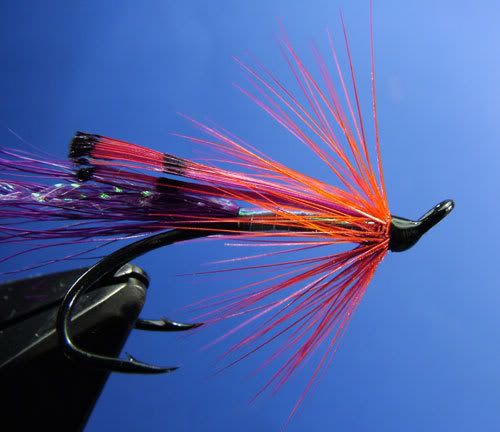
And now with the proper hackle.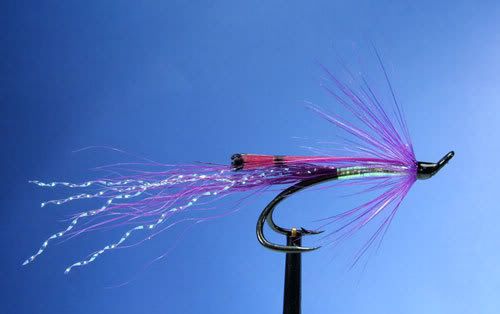
-
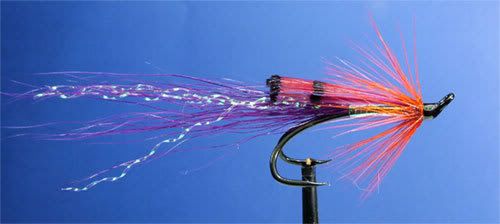
This is a variation of Andy Wrens Silk Cut Shrimp. It’s only a variation because when I came to select the hackle I discovered I hadn’t any purple hackles left! :-[ However the tying process is the same so I decided to post anyway. After tying it I thought it would make a good Steelhead pattern.
This is not a popular pattern in my neck of the woods. Purple just doesn’t work on Southern Scottish salmon (normally) but it has a reputation further north, particularly for springers.
Instructions assume right-handed tyers.
HOOK – Partridge Salar Double #7
THREAD – Black 6/0
TAIL – Purple Bucktail + a few strands of pearly Chrystal Hair.
BODY – Flat Pearl
WING – Purple Golden Pheasant Tippet
HACKLE – Red Cock (Purple on the original)
STEP 1
Mount the hook in the vice and attach the thread.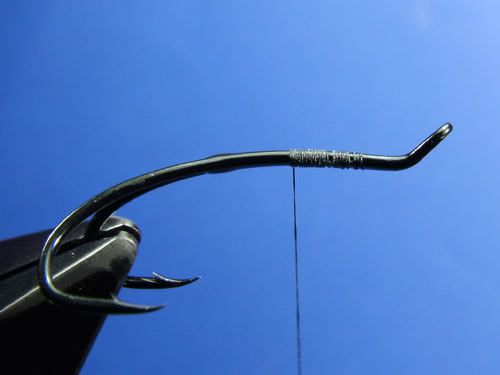
STEP 2
Tie in a fairly long sparse tail.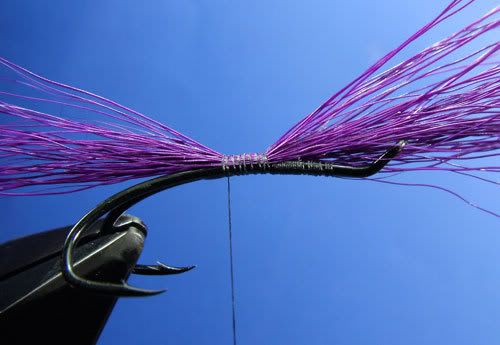
STEP 3
Tie in a couple of strands of Chrystal Hair. I loop it round the thread as shown which gives it added strength.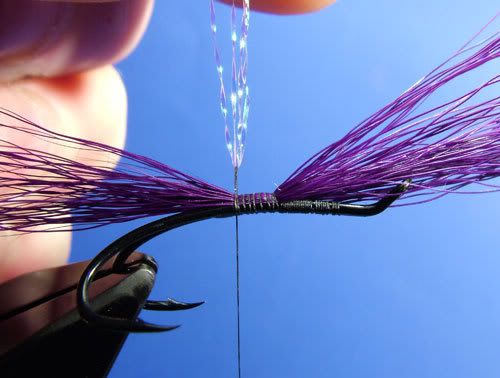
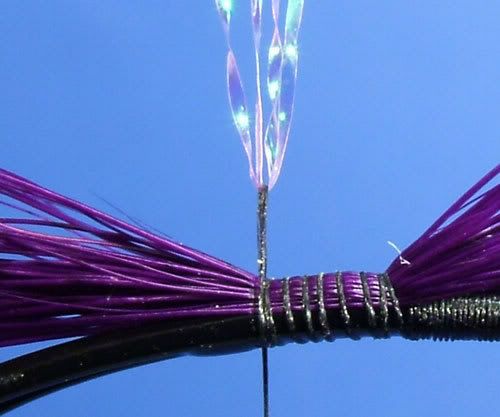
STEP 4
Take the thread back to the shoulder of the fly and tie in the flat Pearl tinsel.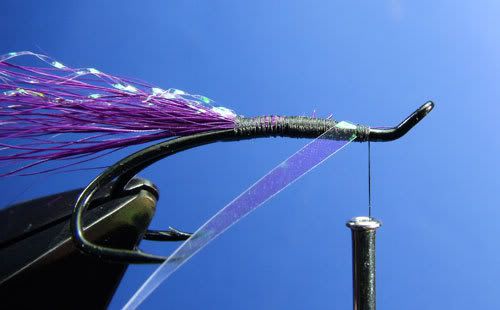
Then wrap to the tail and back to form the body. You can varnish the thread before winding for added strength and also the body after wrapping.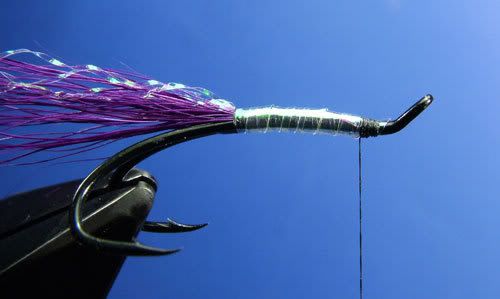
STEP 5
Mount the wing. Keep it low to the body.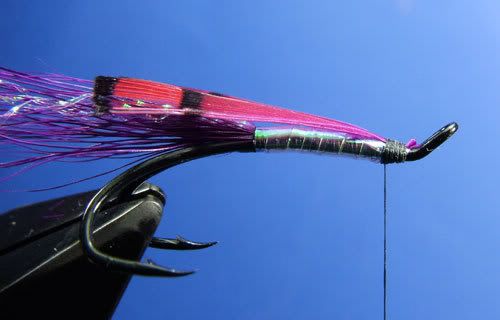
And parallel.
-
Nice tie of a good looking pattern and some cracking fish... But I gotta ask, why is it called an emerging leech?
-
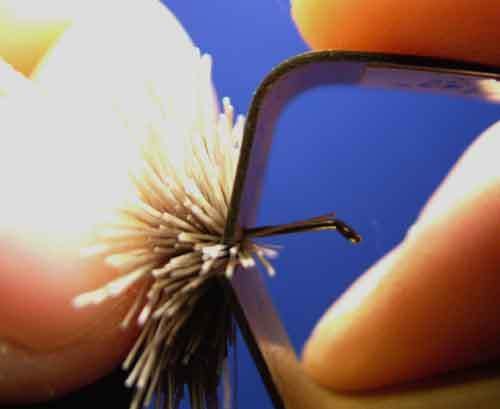
It's important to remember to support the hook/hair when you're packing it.
Like this, taken from an sbs I did on the irresistible.
Start making the spun body. After a couple of bunches of hair have been spun you should pack the hair. You can use your fingers, but I think a “brassie” is better. Don’t forget to grip the tail end, you need something to pack against and if you don’t you will push the dressing round the bend.
You might find this sbs useful too.
http://ukflydressing.proboards83.com/index...read=1185695506
-
I used to tie at least 5 nights a week during the winter, tying, depending on pattern, anything from 4 to 6 doz at a sitting. Usually all the same pattern.
Don't tie like that now unless I'm doing some flies for friends or swaps!
-
I have a bunch of CDC that I've tried using for tying the EHC. When i try to palmer it the stems keep breaking on me. Is there a way to easily soften them or is there another effective way to add the CDC without palmering it?
Thanks.
It would be a massive help if you told us exactly where it is snapping.
Assuming it's at the tie in point, then I would hazard a guess and say you may be tying them in too close to the tip.
When you tie them in try taking a couple of "soft" turns at the butt end, then pull the plume through to nearer the tip. This way you will trap the stem and some fibres which will help strengthen at the tie in point.
-
Forgot about this one, explains it perfectley on video.
-
Not one of my better ones, but you should get the idea.
-
STEP 10
Apply another pinch of dubbing to the thread.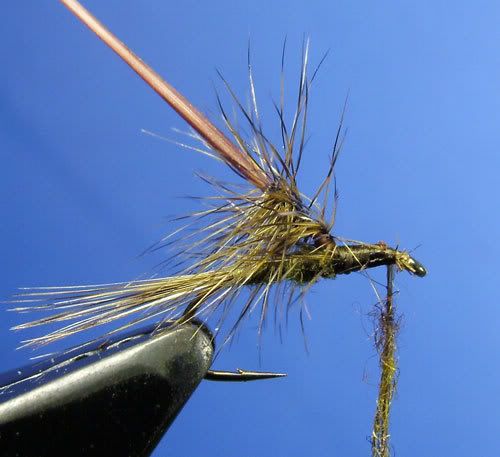
Then wrap to form the thorax.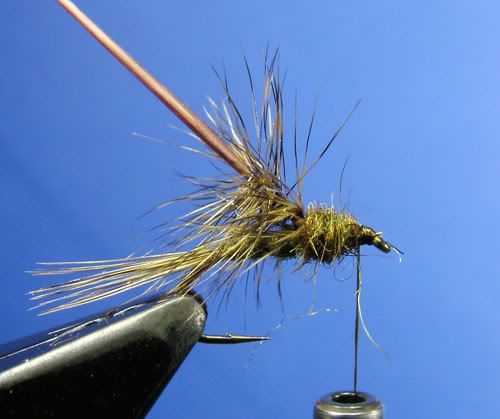
STEP 11
Remove the hackle from the gallows tool. The hackle is tied in securely so you don’t have to worry about keeping a tension on at this point.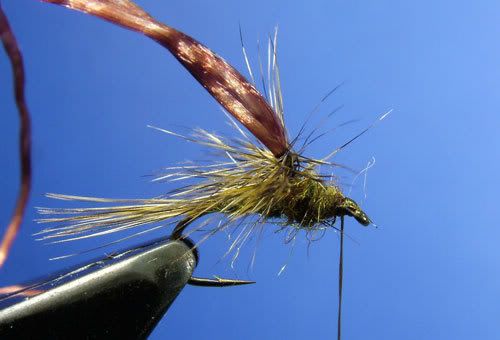
Then pull it over the thorax and tie down at the eye.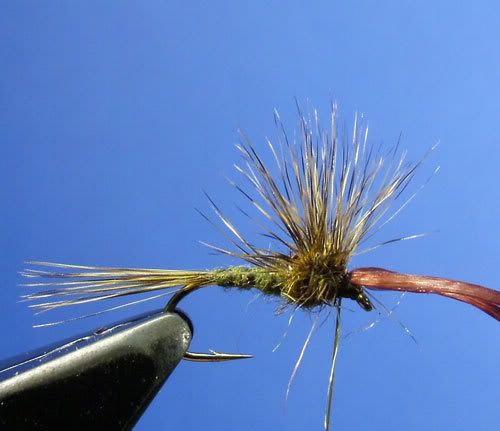
I like to make two or three tight wraps. Pull tight on the tag as you tie it down, then lift the tag up and make one turn of thread under it.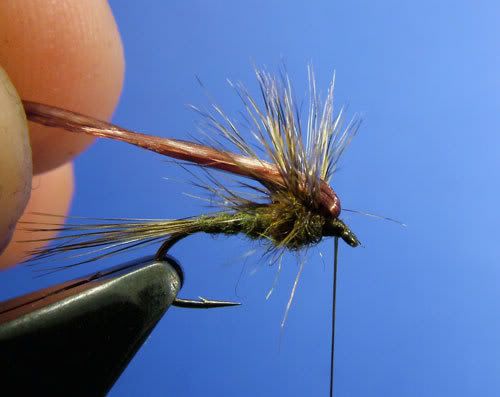
Then pull it back down and make another couple of wraps, before trimming the waste.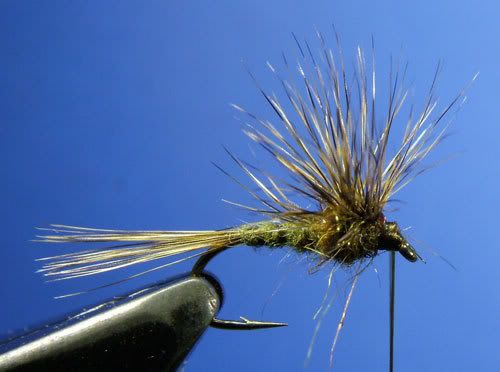
STEP 12
Whipfinish and varnish for the completed fly.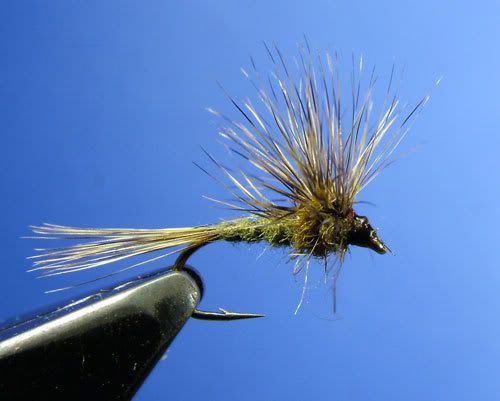
Viewed from the front.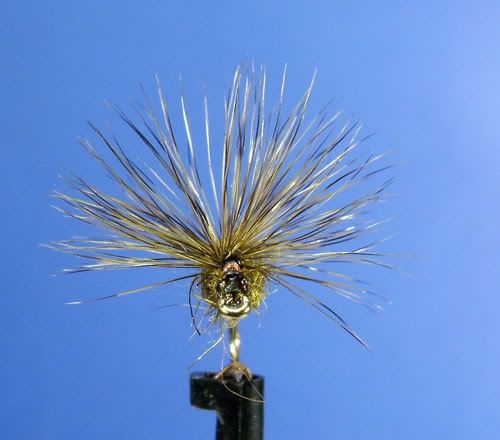
Above.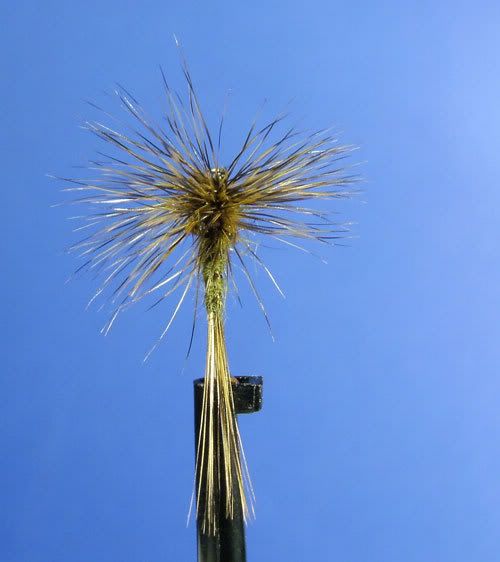
Below.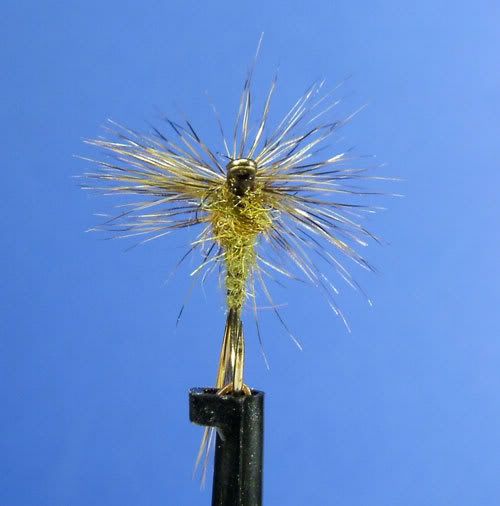
-
STEP 7
Wrap the hackle up the post. The number of turns will depend on the size and type of paraloop you are tying. I have done four turns for this fly.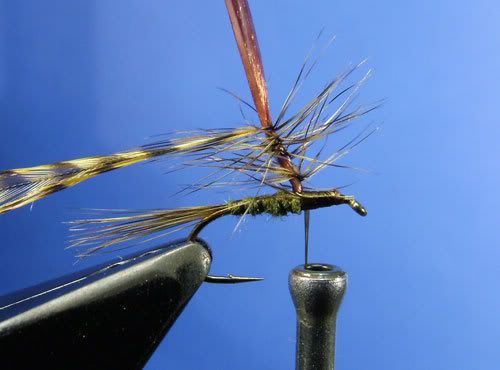
Then back down, finishing with the hackle tip as shown.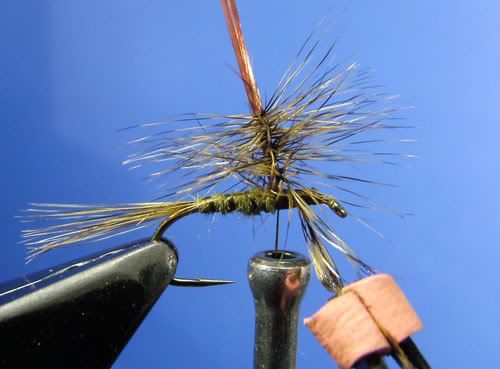
With your left hand sweep the hackle fibres back and tie the hackle off.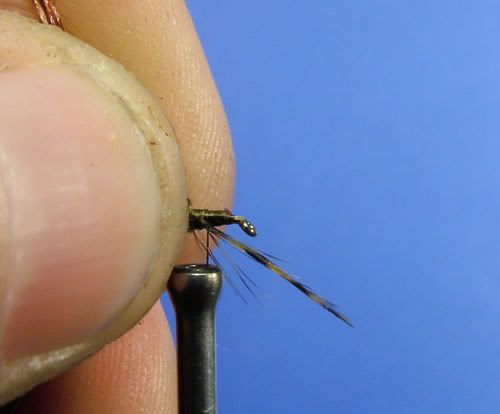
STEP 8
Trim the waste tip off and then compact the hackle by pulling (not too hard) the loop apart. This will force the hackle down. You can also help it by pushing it down with your fingers as well.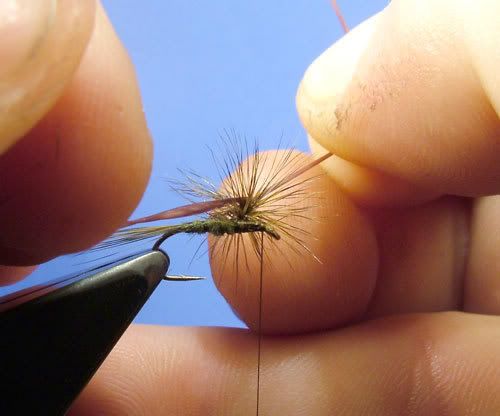
STEP 9
You can sweep the hackles back if you want a parachute style profile to the fly. Omit this step if you want some hackle tips to project below the fly.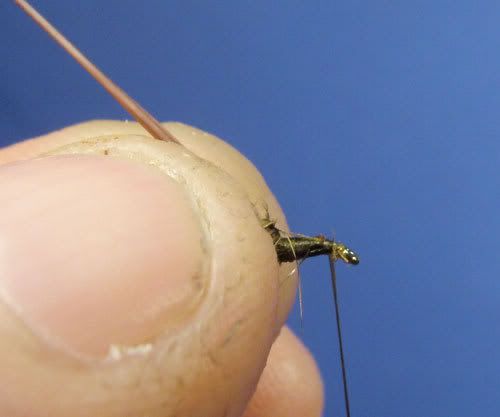
-
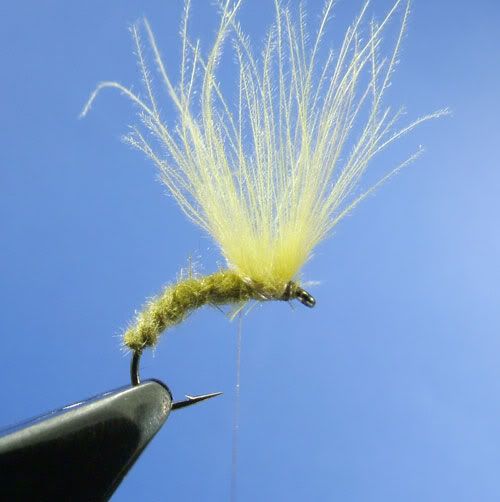
Instructions assume right-handed tyers
HOOK – Kamasan B170 #14
THREAD – Olive UTC 70
TAIL – Dyed Olive Grizzle
BODY – Olive Beaver Dubbing
RIB – Thread
WING POST – Flexi Floss
HACKLE – Dyed Olive Grizzle
THORAX – Olive Spectrablend
STEP 1
Attach the thread and wrap down the hook. Leave the tag to use as the rib later.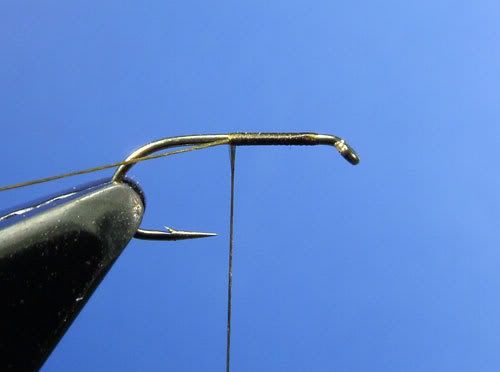
STEP 2
Tie in a small bunch of Hackle fibres for the tail.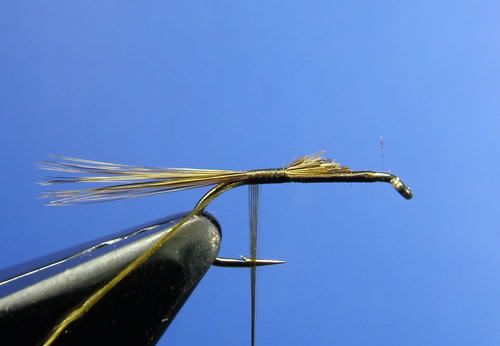
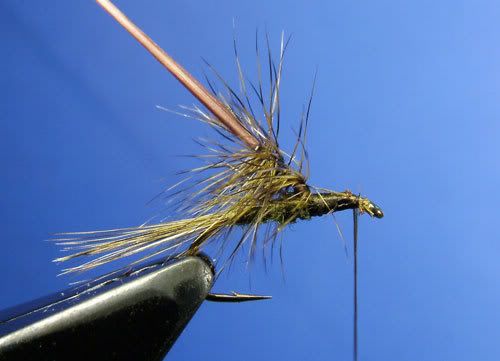
STEP 3
Apply some dubbing to the thread and wrap to form the body.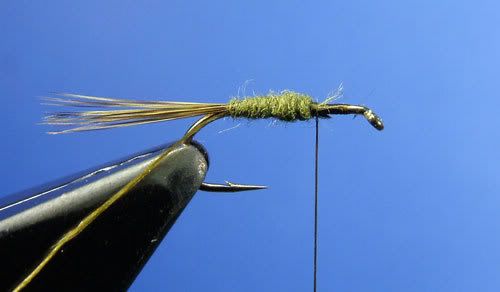
STEP 4
Follow with rib.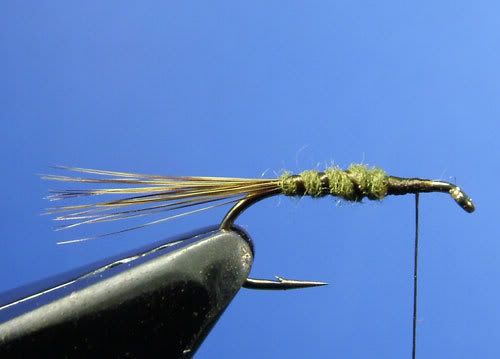
STEP 5
Tie in a loop of Flexi-Floss.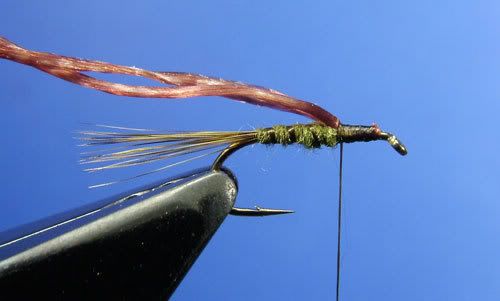
STEP 6
Tie in the hackle.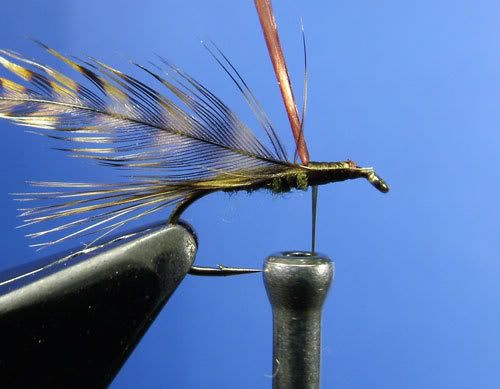
-
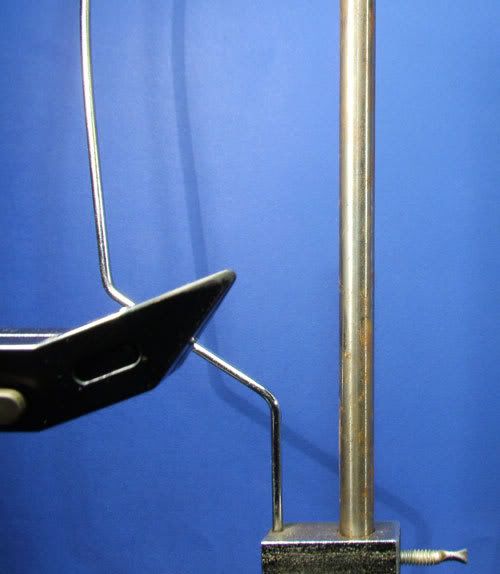
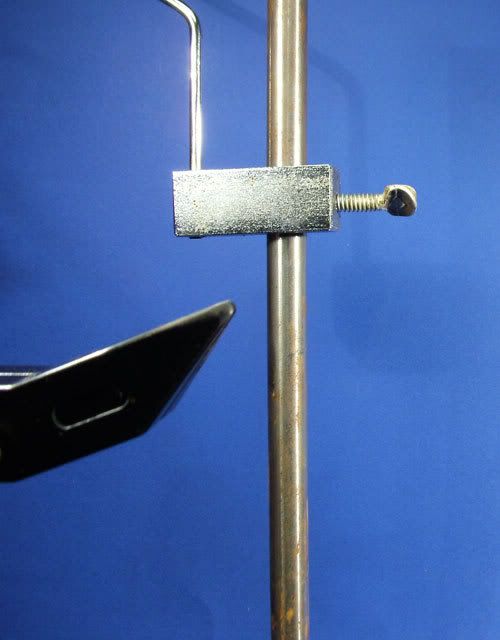
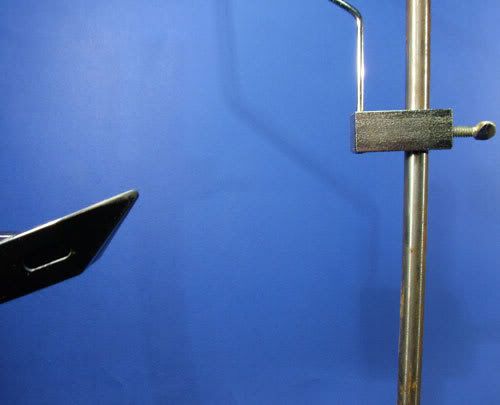
Another one I thought you might enjoy.
This is how I tie Ian Mouter’s Paraloop style flies. Like many styles it can be adapted to tie almost any type of fly. For the post you can use virtually anything. My two favourites are GSP thread and Flexi-floss, which I have used here. I tie mine slightly different to Mouter. In his books he uses two anchor points for the hackle post. One above the fly and one behind the fly… Too much footering about for me. My solution is to mount my gallows tool on a stem fixed into a vice base. This means I can simply move the base to any position I want.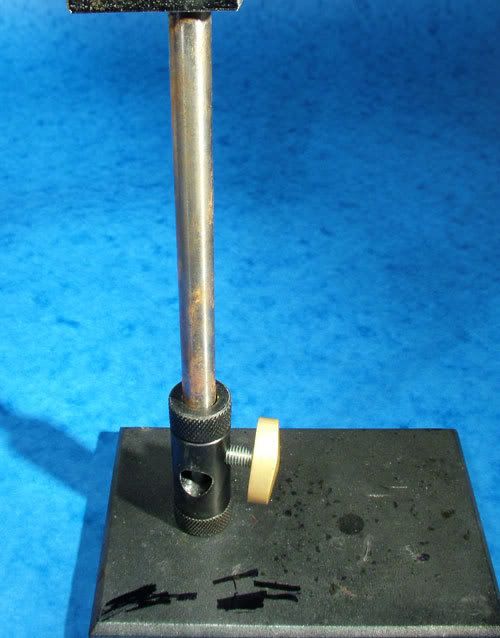
-
What the Trout said (about the design of trout flies and other mysteries) - Datus Proper
-
Your final turn of thread should finish behind the wing post as shown.
STEP 9
Split your thread again and insert the clip with the two CDC’s into it. You want the loop to catch the CDC in the middle this time as shown.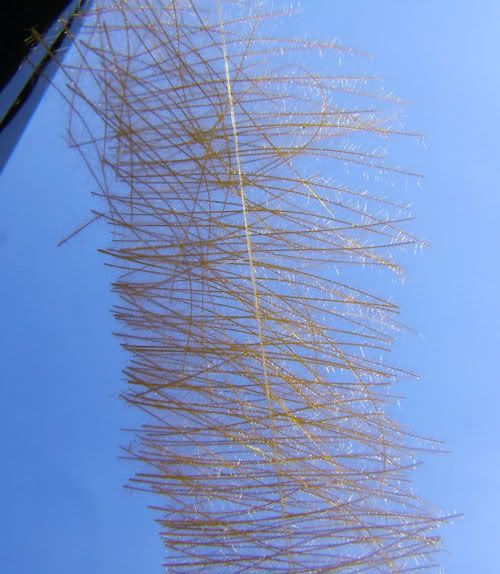
Then spin your bobbin to form the CDC “hackle”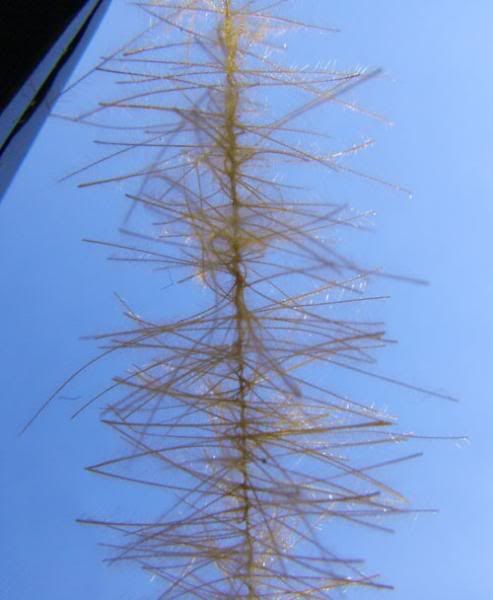
STEP 10
Wrap the hackle. Make a few turns behind the wing post.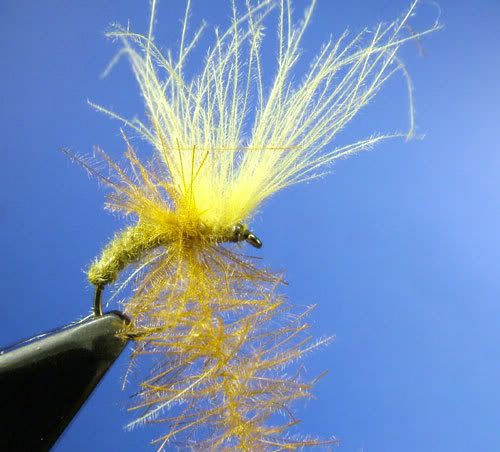
And a few turns in front of the wing post.
.
STEP 11
Form a neat head, whipfinish and detach the thread.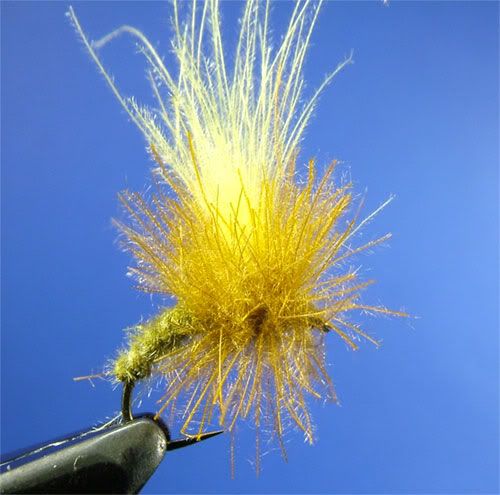
STEP 12
Finally, trim the wing post to length. Then use your fingers to sweep the CDC hackles from under the shank as shown.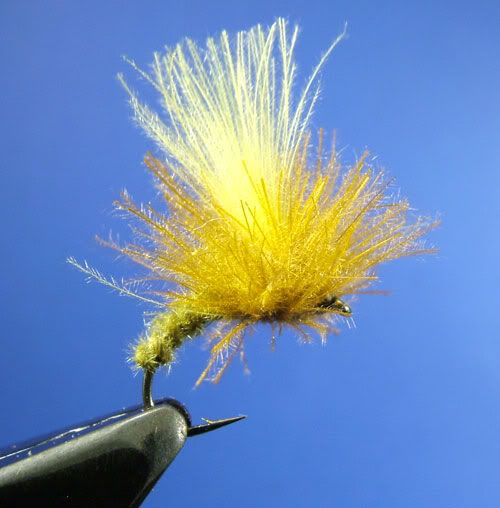
A spot of varnish on the head and you’re finished.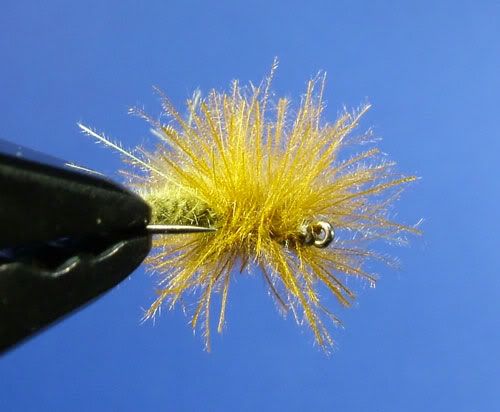
As I said at the beginning, this fly is infinitely easier to tie than it is to photograph.
The Blob
in Fly Patterns
Posted
No, your flies are coming to me in
EnglaEngEthe bit below ScotlandWhere I live is where the money is, but not where my heart is!
Look on the bright side.. You're not all bad